GPS Field Data Collection on iPhone & iPad
GoGIS brings location capture, forms, and photos into the same field project. Use it to record observations against mapped features, while checking whether the available positioning accuracy meets the requirements of the job.
GoGIS turns that hardware into a complete field data collection system. You define the data schema, design the entry form, walk to your location, and tap. The GPS coordinates are captured automatically, your custom form pops up, and everything is stored locally on the device. No cell signal needed. No cloud account required.
How GPS Works on iPhone (No Internet Required)
An iPhone can obtain a satellite position without cellular coverage. Reception and accuracy vary with the device, surroundings, and sky visibility. Download the reference data you need before leaving service.
GoGIS displays the reported location accuracy before you collect. Treat this as an estimate, not a guarantee of the point’s true position. Wait for the location to settle and check the reading before saving.
Setting Up a Point Layer with Custom Attributes
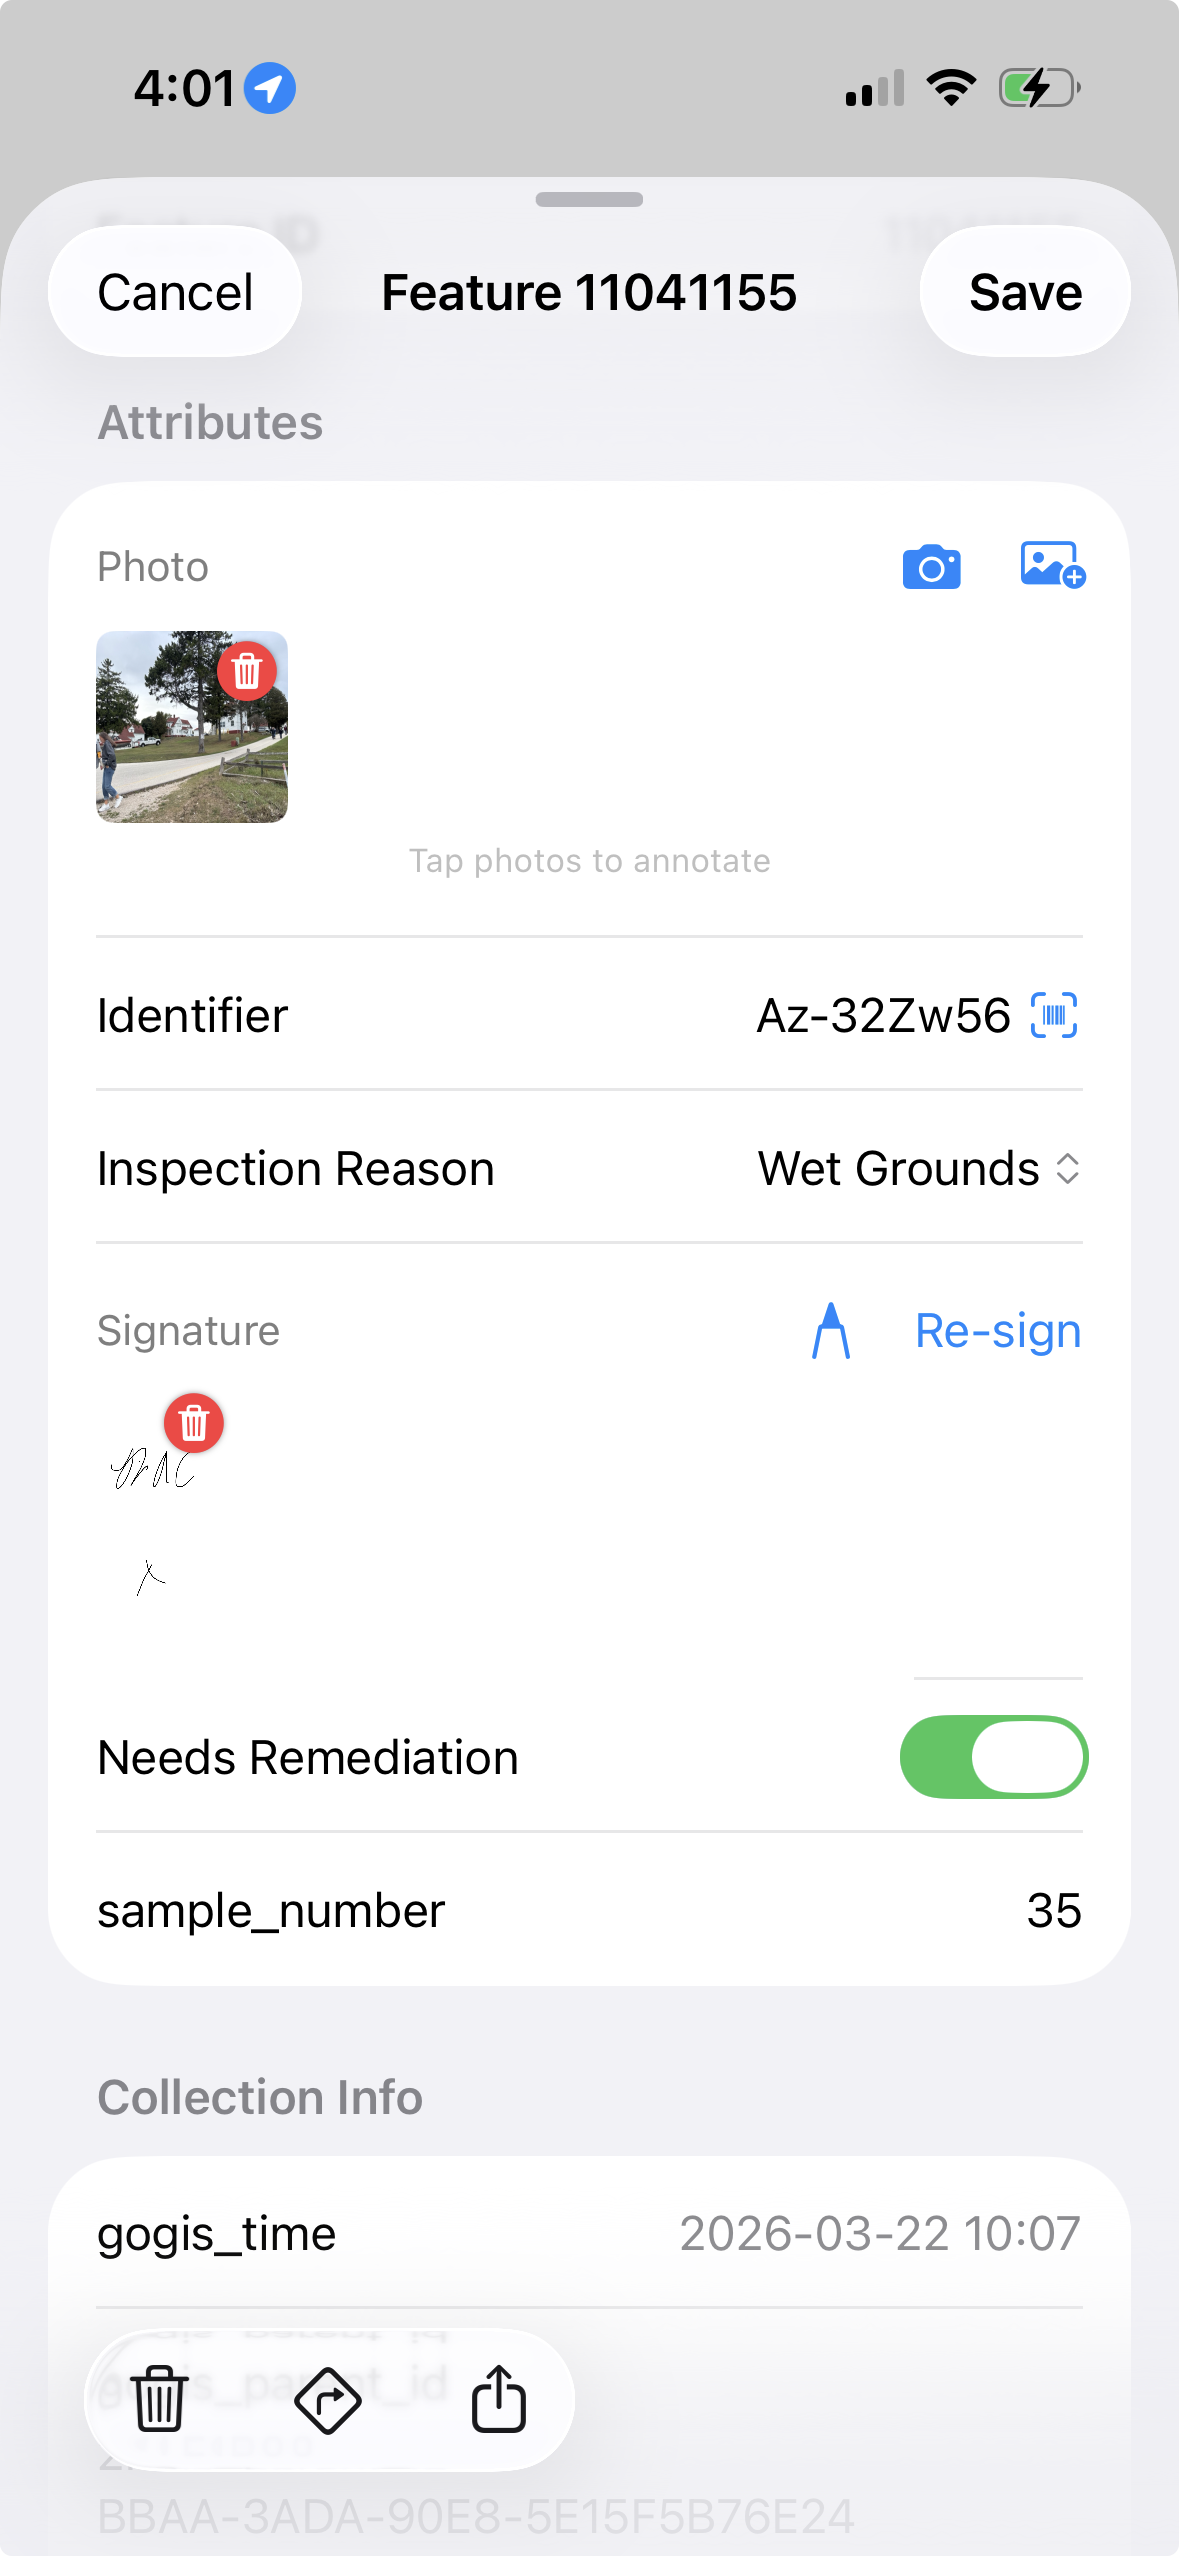
Before heading into the field, create a new point layer in GoGIS and define the attributes you need to collect. Each attribute becomes a field on the data entry form. You choose the field type that matches the data:
- Text — free-form notes, addresses, descriptions
- Pick list — a fixed set of choices (species, condition rating, material type)
- Date/time — inspection dates, scheduled follow-ups
- Photo — attach one or more camera images to the feature
- Barcode / QR — scan equipment tags, sample IDs, asset labels
- Signature — capture sign-off for chain-of-custody or inspections
Set up the form before leaving for the field. Consistent choices for material, condition, and other recurring observations make the resulting records easier to review and compare.
Collecting Points in the Field
You can place a point manually on the map or collect one at the reported GPS position. Choose the method that matches the observation: a manually placed point should not be mistaken for a measured GPS location.
The moment a point is placed, the custom form opens. Fill in the attributes, snap a photo if needed, scan a barcode, and save. The feature appears on the map immediately. Move on to the next one.
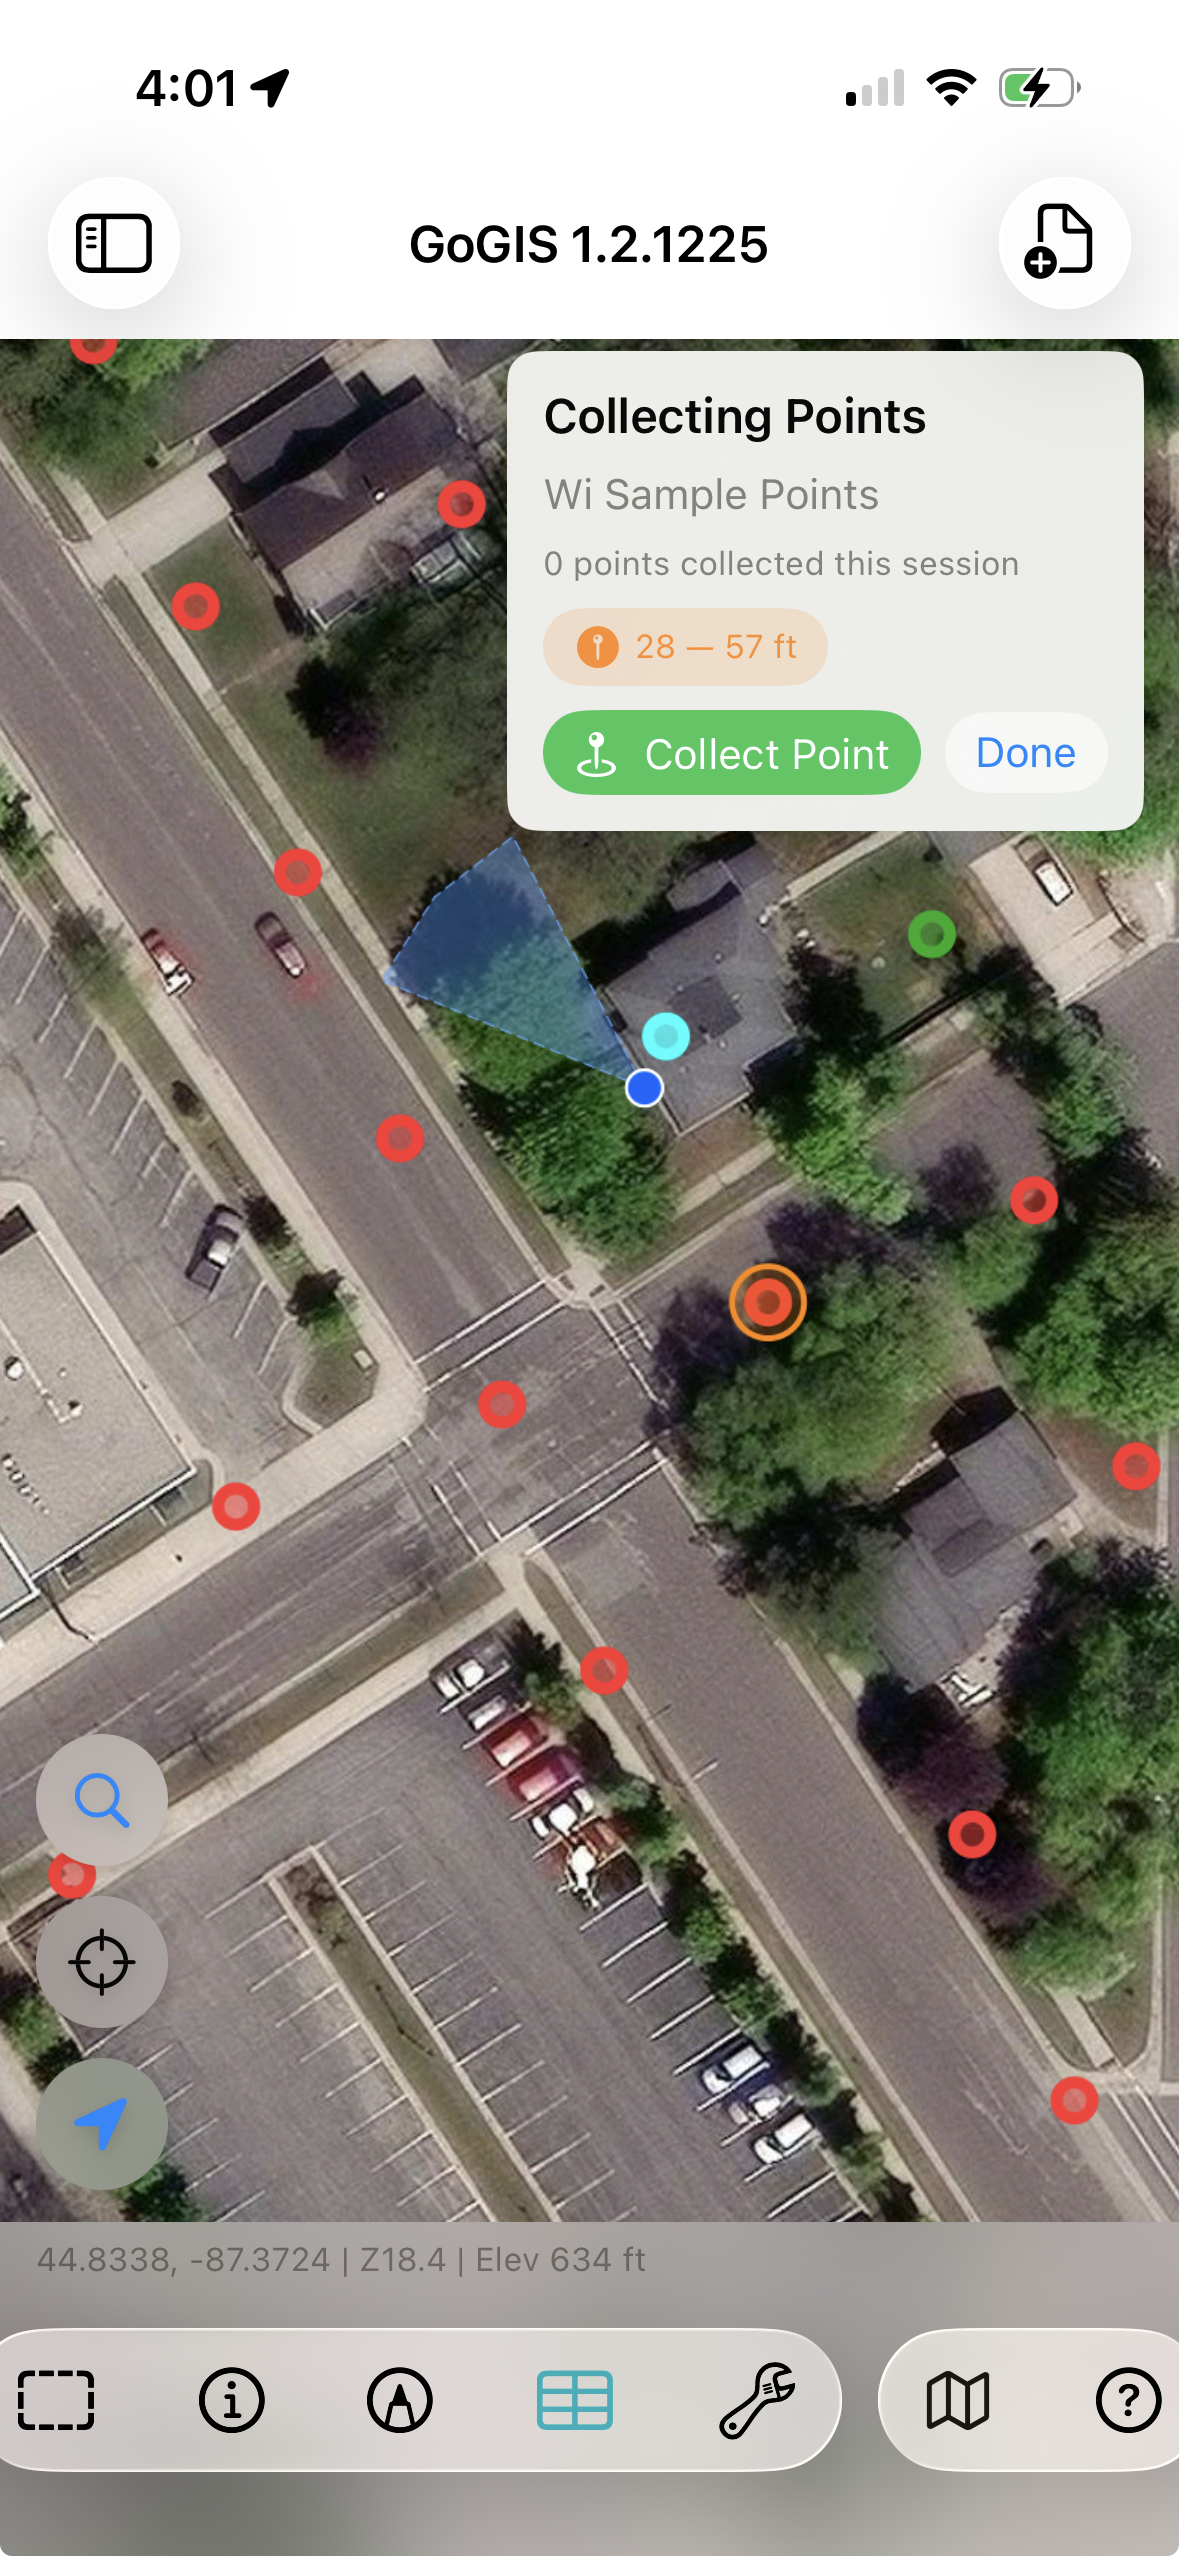
Records are saved on the device, so collection does not depend on a cloud connection. Imported vector layers remain available offline. Built-in basemap downloads cover supported USGS sources in the United States and GSI sources in Japan; see the offline preparation guide.
Exporting and Sharing Your Data
When collection is finished, export the layer in the format your team needs. GoGIS supports GeoJSON, KML, CSV, and Shapefile. Photos are bundled into the export ZIP alongside the spatial data. Share the file via AirDrop, email, or any app on your device.
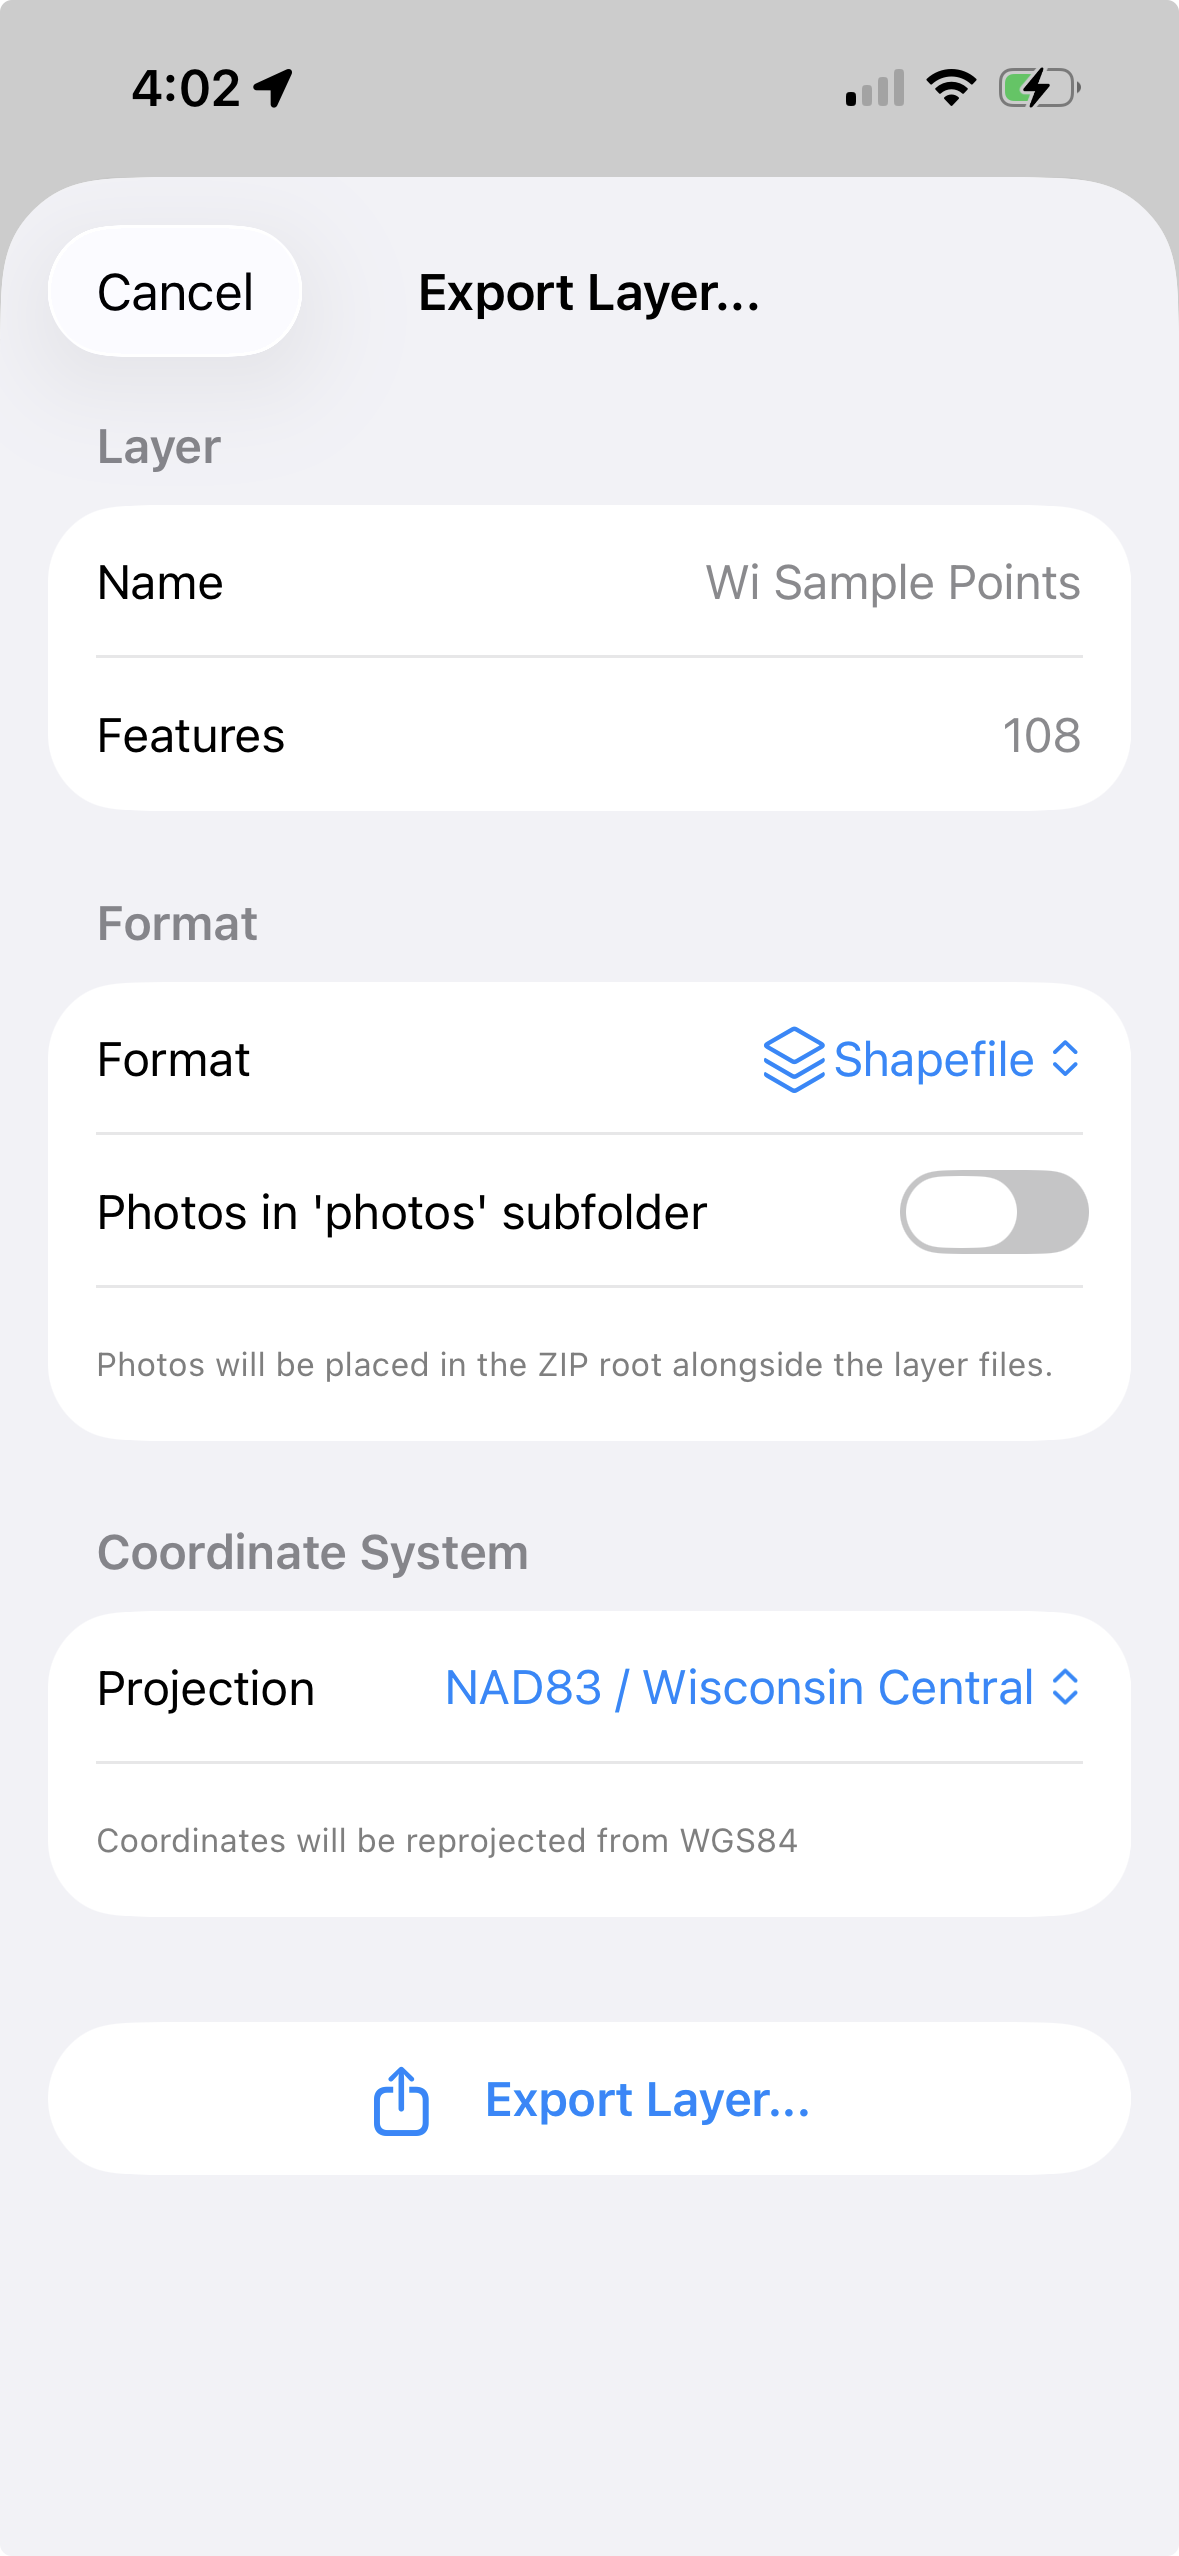
Choose an export format supported by your receiving GIS or spreadsheet application. Review the coordinate system, attributes, and media package before sharing the results.
Choose Positioning Hardware for the Job
A phone is useful for many field observation tasks, but higher-accuracy work may require an external receiver and a suitable collection procedure. GoGIS supports Bad Elf receivers on iPhone and iPad. Wi-Fi-only iPads do not have built-in GPS/GNSS; their estimated location should not be treated as a satellite fix. Check the hardware you will use before heading into the field.